Archives often have a reputation of just containing old documents and official records. These documents contain interesting information but may seem a bit dry. Well archives are in fact repositories of all sorts of documents, including knitting patterns!
In 2021 we received some old schoolbooks belonging to Kathleen Barnes. She attended Cholsey Board School in the 1930s (D/EX2821). More detail about the collection can be found on our online catalogue.
Included in the books was a ‘Needlework and Knitting’ book (D/EX2821/4) containing notes and instructions from her lessons. We thought it would be fun to try out one of the patterns.
Read on to discover how our attempt at knitted table napkin rings went!
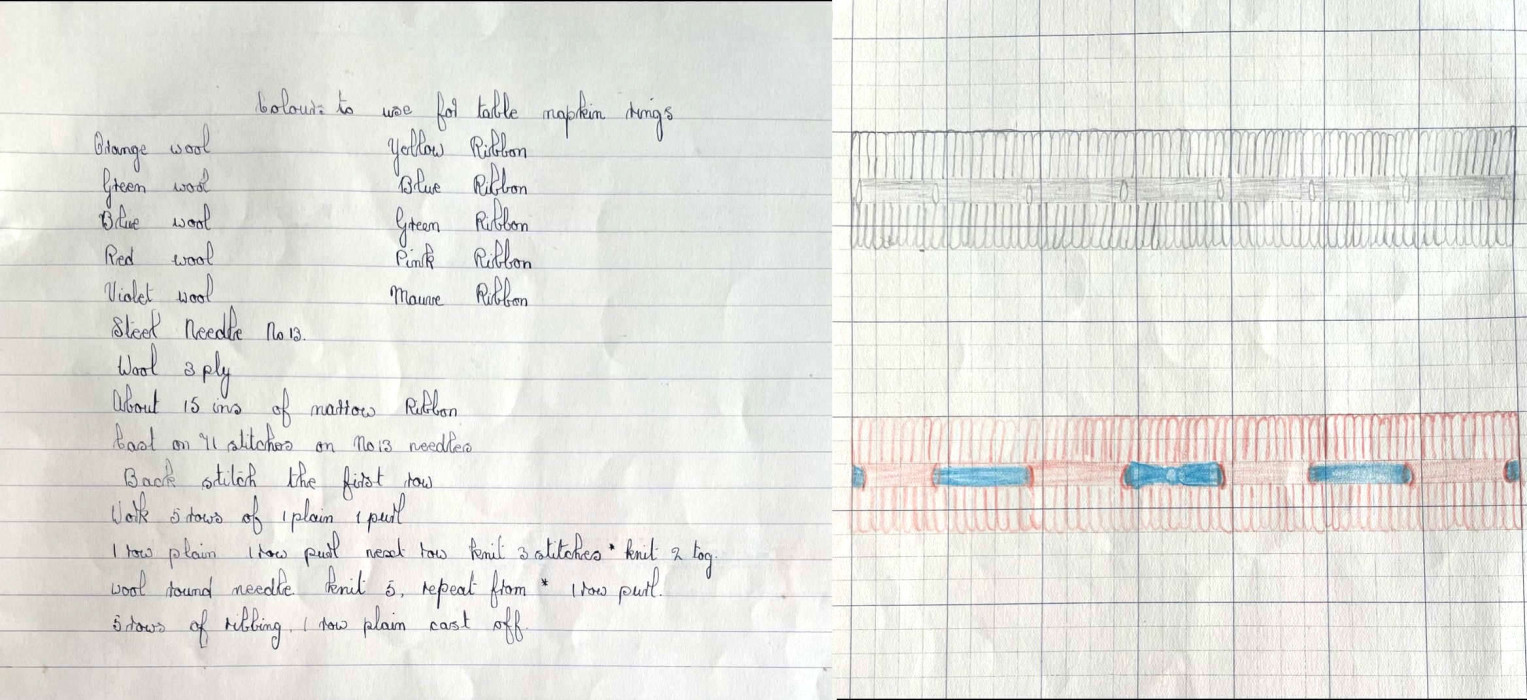
This is the pattern:
No 13 needles, 3 ply wool
Cast on 71 stitches
Back stitch the first row
Work 5 rows of 1 plain, 1 purl
1 row plain, 1 row purl, next row knit 3 stitches *knit 2 tog wool round needle knit 5, repeat from * 1 row purl
5 rows of ribbing, 1 row plain. Cast off.
For the first attempt we wanted to keep as close to the original pattern as possible. However, we were unsure what No 13 needles were in modern measurements and had no 3ply wool available. So the first attempt was made using 4mm needles and double knitting wool.
After that decision had been made, we then had to try and decipher what ‘back stitch the first row’ meant. ‘Back stitch’ in a knitting context was not something we’d come across before (other than when sewing up). In the end we went with a standard plain/garter stitch for this row.
After knitting 5 rows of 1 plain, 1 purl, it resulted in moss stitch. Comparing it to the sketch, we decided it should be rib. Therefore, after unpicking, we alternated stitches so that a rib pattern was created.
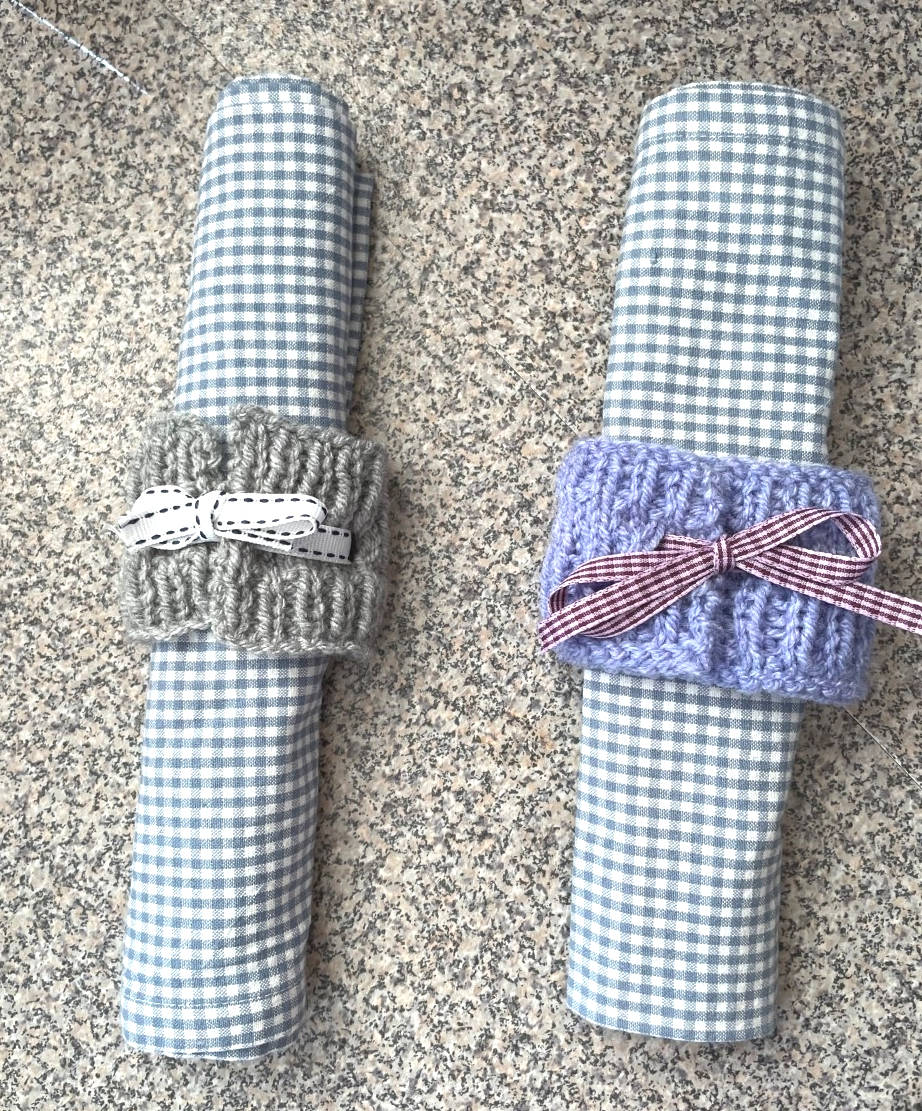
The rest of the pattern was straightforward enough to follow we made no further alterations. We added a ribbon to thread through the holes, as stated in the pattern, and a napkin to try it on. Here is an image of the first attempt.
As expected, using larger needles and wool, whilst keeping the same number of stitches, resulted in a rather large napkin ring! We ended up wrapping it around the napkin twice, Fortunately, two of the holes matched up so the ribbon could be threaded through and still give a neat finish.
Whilst the ring worked, the size and the finish was not as expected as the top rib section was bigger than the bottom rib section. The holes were also too close to the top of the middle section.
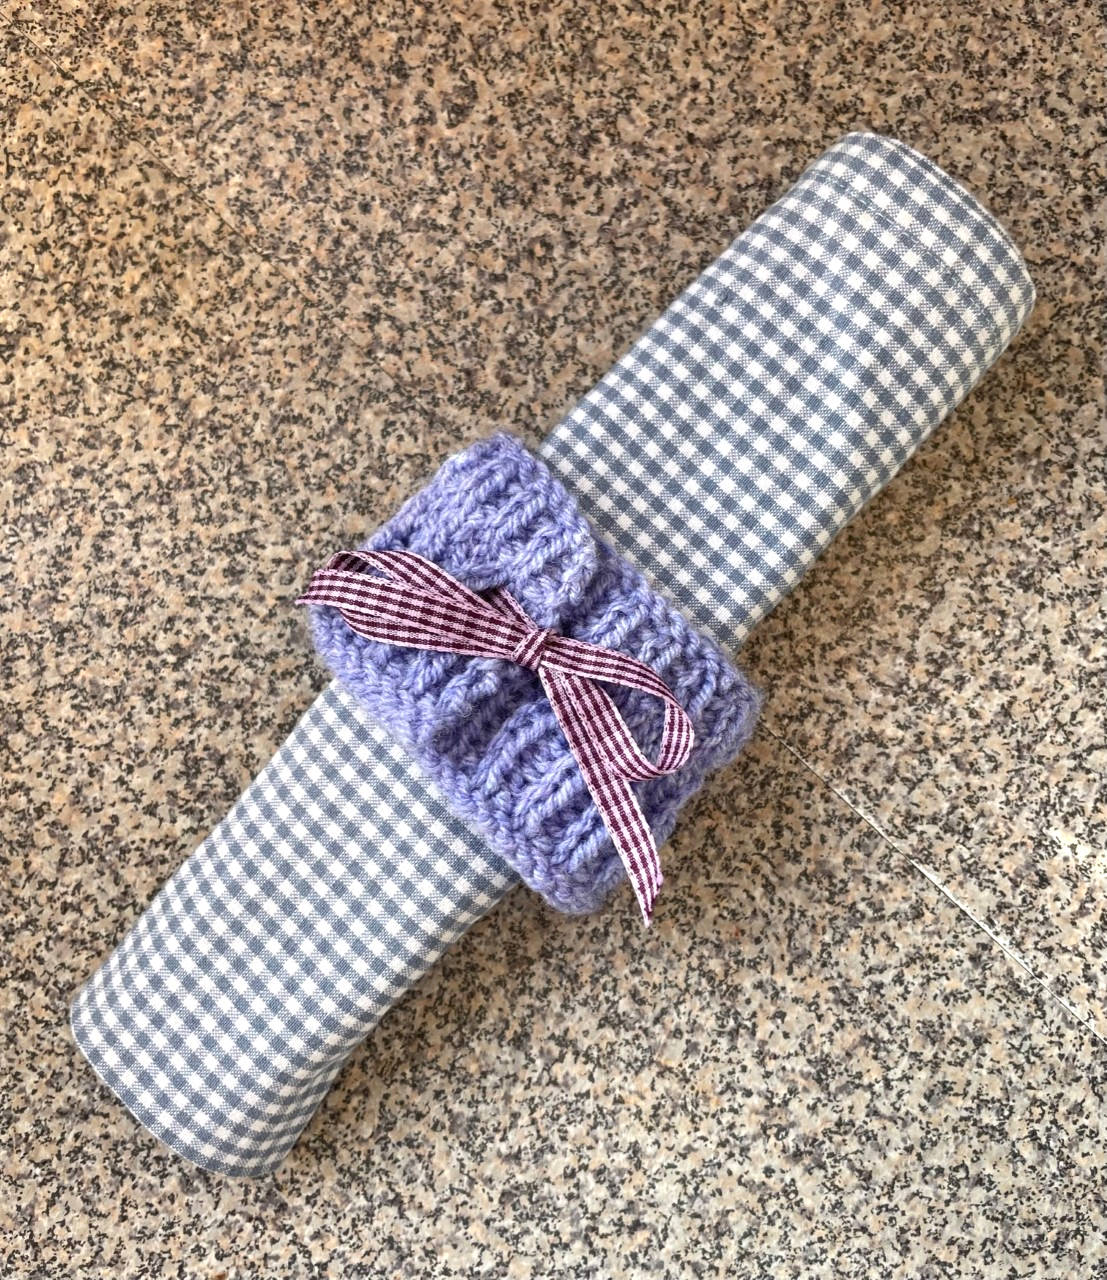
Therefore, we gave it another go, again using size 4mm needles and double knitting wool. But this time we halved the number of stitches, using 35, and did 5 rows of stocking stitch making the holes on the third row as follows:
Cast on 35 stitches
Row 1 – Knit
Rows 2-6 – Work in rib
Row 7 – Knit
Row 8 – Purl
Row 9 - Knit 3 stitches *knit 2 tog, wool round needle, knit 5, repeat from*
Row 10 - Purl
Row 11 – Knit
Rows 12-16 – Work in rib
Row 17 – Knit
Cast off.
This resulted in a smaller ring that went round the napkin once. The sections also looked more even. An image of the finished napkin ring can be seen below.

Knitting from the archive was really quite fun. Since trying it out we discovered a conversion chart showing that No 13 needles are the equivalent to 2.25mm needles if you fancy giving it a go? Don’t forget to try getting some 3ply wool too. You can even let us know how you get on through our social media platforms if you like!