The demand for arts and crafts products rose considerably during the pandemic with many individuals seeking a new hobby to keep themselves busy at home. One craft that saw a resurgence in popularity and continues to show no signs of slowing is cross stitch.
Cross stitch is a form of embroidery in which ‘X’ shaped stitches are made in fabric such as aida or linen. Most people’s first experiences of cross stitch are at primary school during enrichment activities. We can see from the records of Bradfield CE Primary School (SCH24) that pupils of late 1900s were no exception to this.
The school itself first opened as Bradfield National School in 1886. From 1886-1929 the infants and elementary schools were separate. In 1949 it became an all-age school but converted to a primary school in 1957.
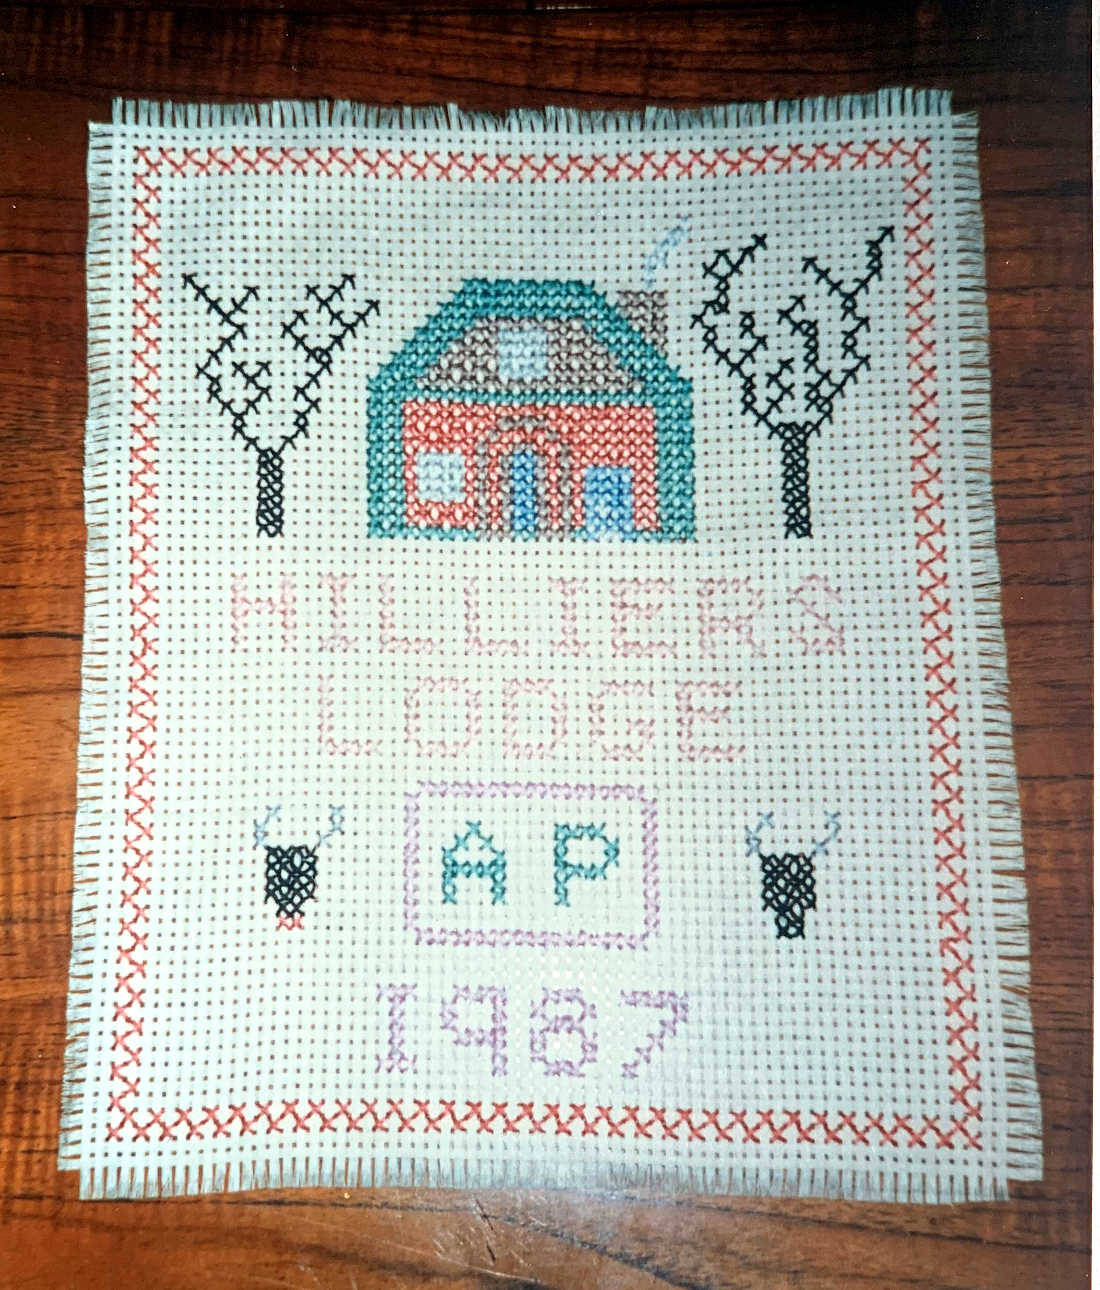
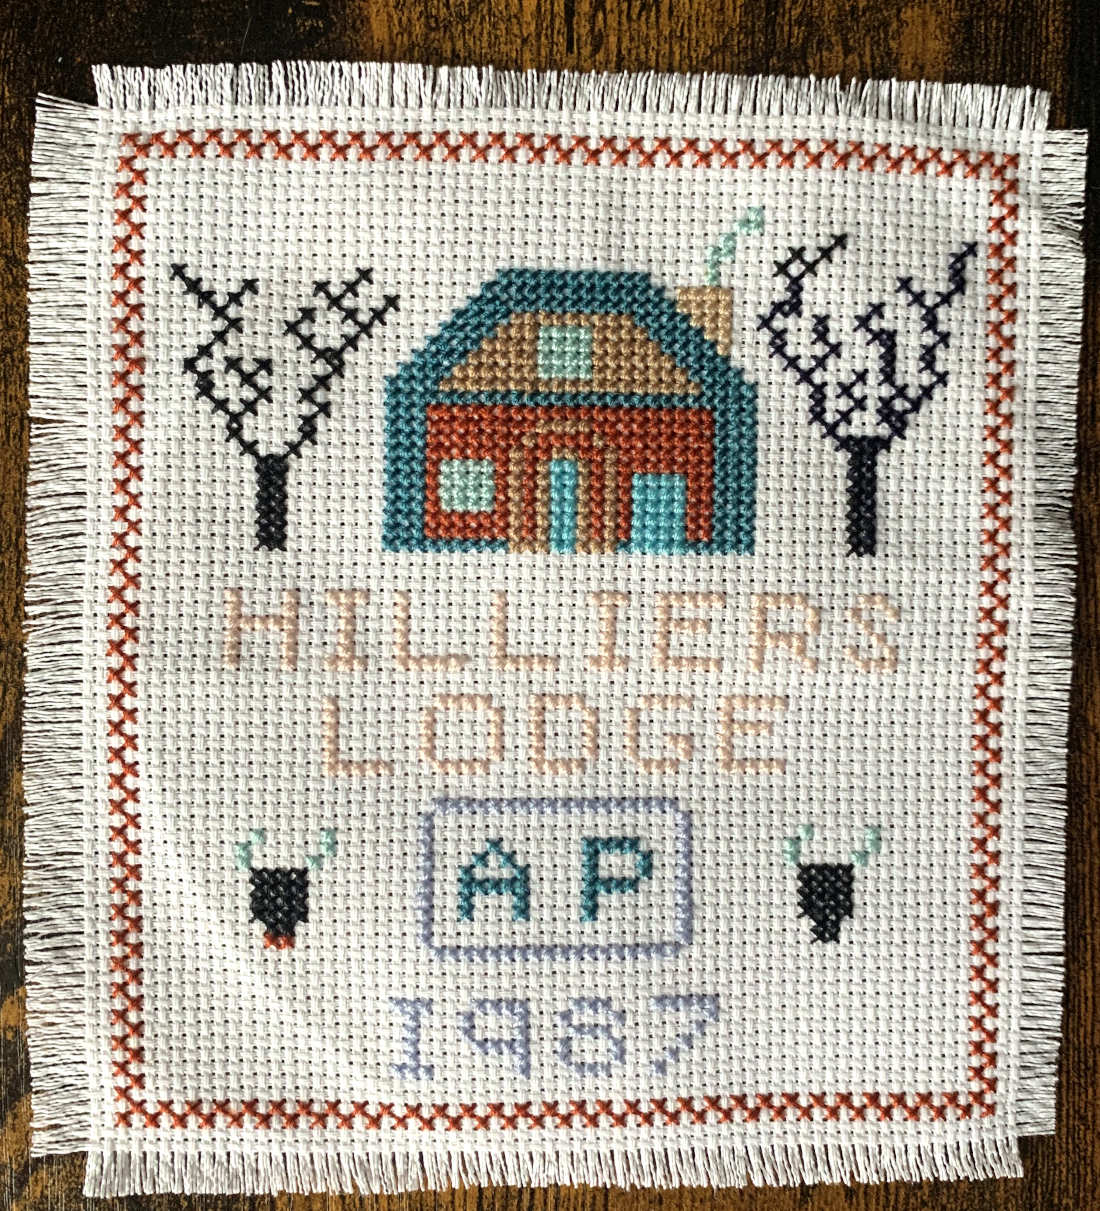
Within the collection are four photographs of children's cross stitch projects, 1976-1987 (SCH24/15/3/1-4) with various motifs such as flowers, trees, bicycles, lampposts, and houses. They share similarities to traditional cross stitch samplers with the inclusion of borders, name of the stitcher and date of completion.
Cross stitchers today follow paper or digital patterns to bring designs to life. As a test we decided to try to recreate one of the examples using a photograph of the finished cross stitch product. We decided to recreate the cross stitch which featured a house, trees and reindeer/ deer as the remaining designs included personal names.
Here is how we got on:
Hilliers Lodge (SCH24/15/3/4) (original pic)
The first thing we needed to do was to gather the materials to start our reproduction. The fabric was quite easy to determine as aida is the most popular choice of fabric when it comes to cross stitch as it was custom designed for the craft. Aida’s neatly defined holes also make it easier when learning to stitch, ideal for beginners and schoolchildren alike. Aida is available in multiple size counts including 14, 16, 18. The higher the count the smaller your finished product will be. Therefore on inspection of the size of stitches we believe the fabric is 14 count aida meaning that there are 14 holes/squares per inch of the fabric.
One of our Archivists then compared the colours of the thread in the photograph with the embroidery threads they had in their “stash” and chose the closest possible matches they could find.
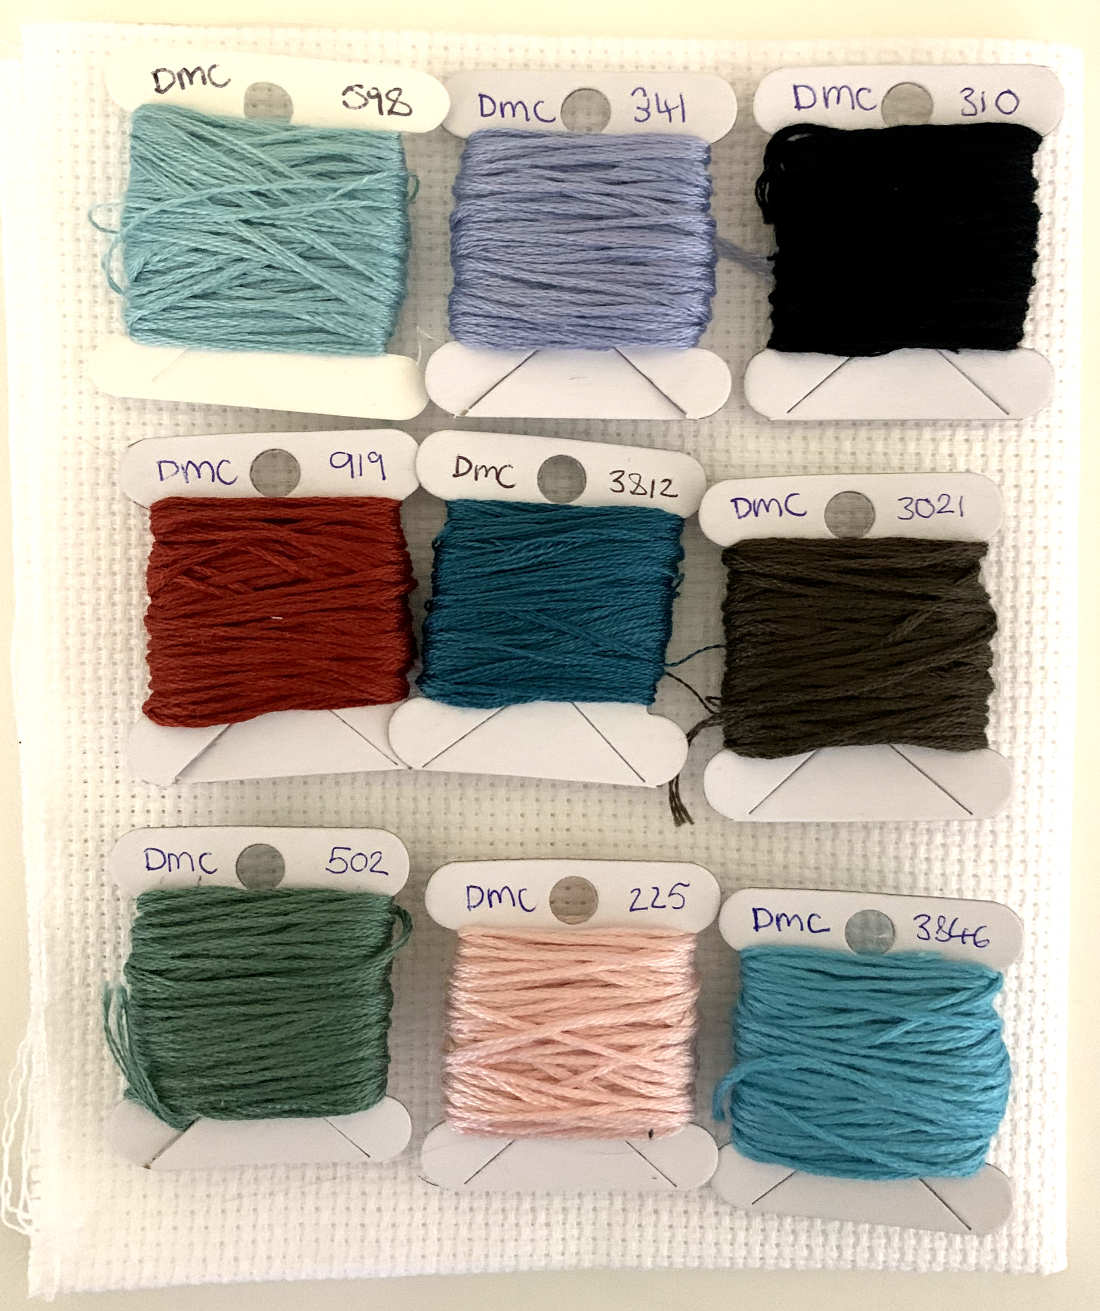
Alternatively, we could have used the photograph as a reference and chosen embroidery threads in our closest haberdashery store. The hardest colour to colour-match from stash was the brown in the house as we didn’t have a greyish brown so had to go for a darker khaki brown as our other browns were too warm toned. In the end, the brown we chose wasn’t right and we swapped it out for DMC 3863.
We selected the following colours and DMC numbers:
- Black – DMC 310
- Turquoise – DMC 3812
- Very pale pink – DMC 225
- Light blue – DMC 598
- Blue – DMC 3846
- Lilac – DMC 341
- Terracotta red – DMC 919
- Dirty mint green – DMC 502
- Greyish brown – DMC 3863
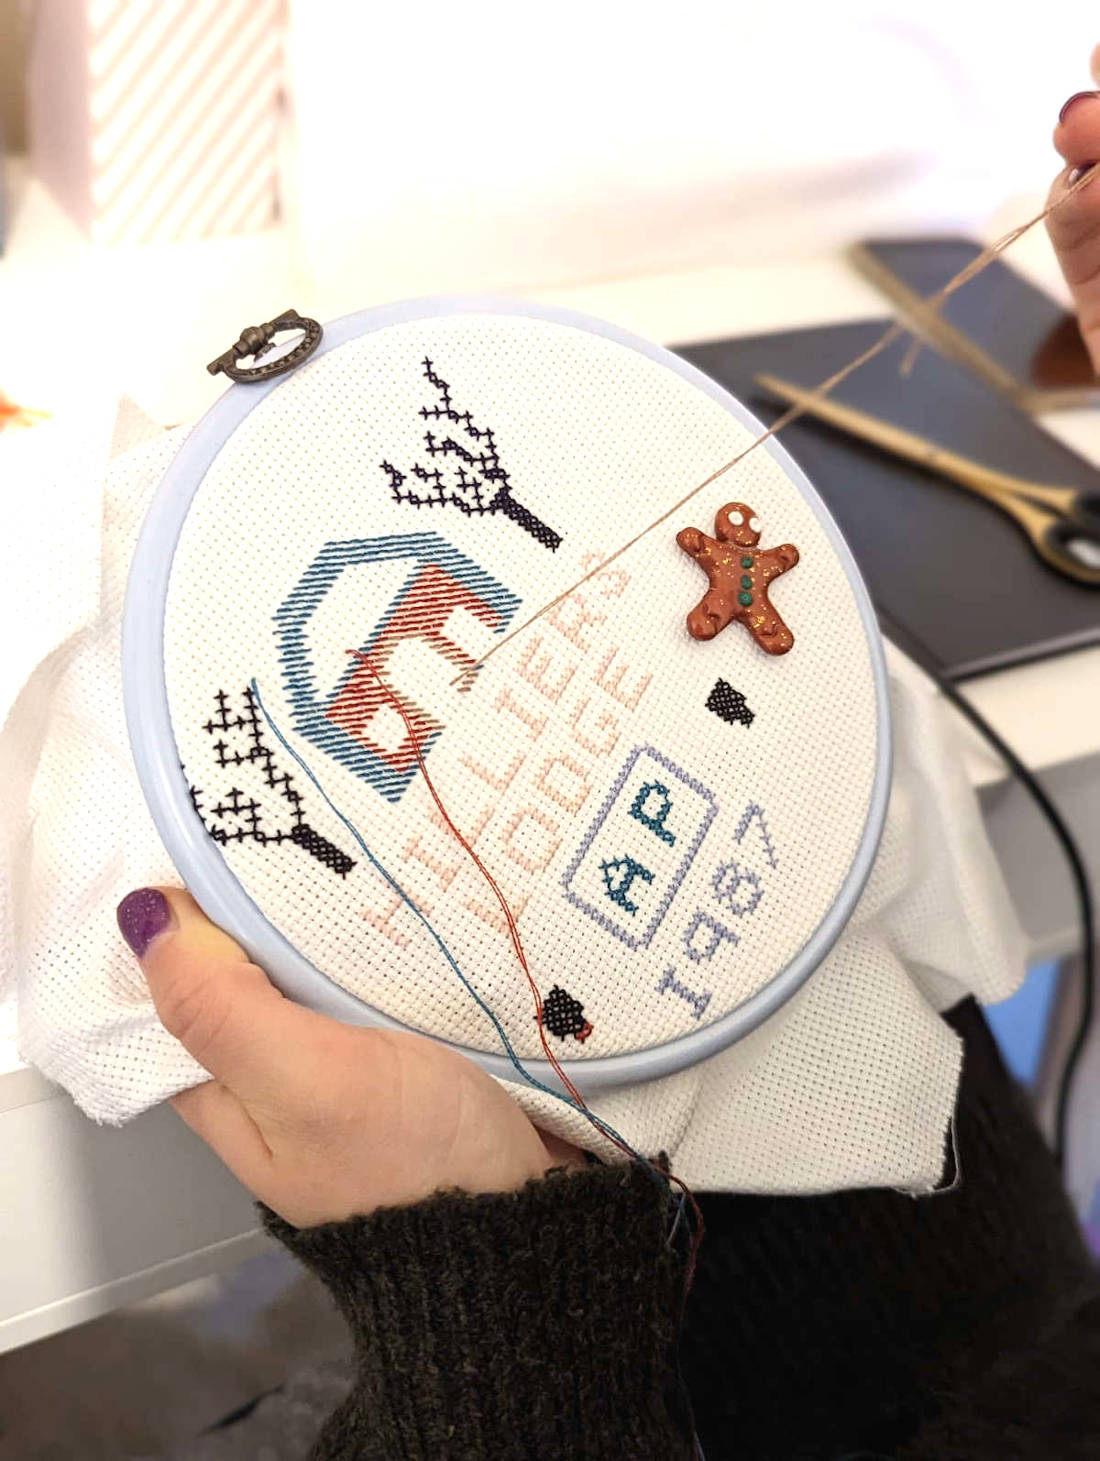
Once we had our fabric, thread, and other accessories we were ready to start stitching!
Pattern instructions often recommend you start in the centre of the design and work outwards therefore we measured width and length and worked out the middle was roughly the second ‘I’ in ‘Hilliers Lodge’ and made our first stitch.
Fortunately, as we mentioned previously, the count of the fabric was high (14) so we could make out individual stitches. Being able to do this enabled us to count out the number of stitches for each motif and the number of squares between them to recreate the pattern. If the count was higher, this would have been significantly more difficult, especially when working from a photograph rather than the final physical product.
The only deviation we made from the original design was to add one additional hole/ space between ‘Rudolf’ and ‘AP’ to make the design symmetrical.
Once we had finished stitching the border all that was left to do was the finishing. The edge of the aida had been intentionally frayed, a finishing technique our Archivist had not previously tried.
We couldn’t find a video tutorial on how to fray the edges of aida as most tutorials where about how to stop this happening! However we did find this useful blogpost with step by step pictures: https://www.tangledthreadsandthings.com/post/how-to-fray-the-edges-of-your-stitching.
Finished stitching the pattern, now time to turn into a FFO (Fully Finished Object).
We could see from the photograph there were two squares before the fraying started and the frayed edge was slightly larger than the width of two squares, so we left five squares when cutting around the edge of the fabric and pulled out three rows to create the frayed edge.
If you would like us to stitch up any more from the collection, please let us know!
If you would like to recreate the cross stitch yourself, we have created a digital pattern using FlossCross you can use: Hilliers Lodge Cross stitch digital pattern.pdf
You will need the following equipment too:
- Aida
- Needle
- Embroidery hoop (or you can stitch in hand)
- Scissors
- Embroidery threads (sometimes referred to as floss)
- Needle minder like the gingerbread man seen in the pictures (optional)